
Run Jobs with Python Scripts
AMS includes the PLAMS Python Library for Automating Molecular Simulations. It takes care of input preparation, job execution, file management and output processing as well as helps with building more advanced data workflows.
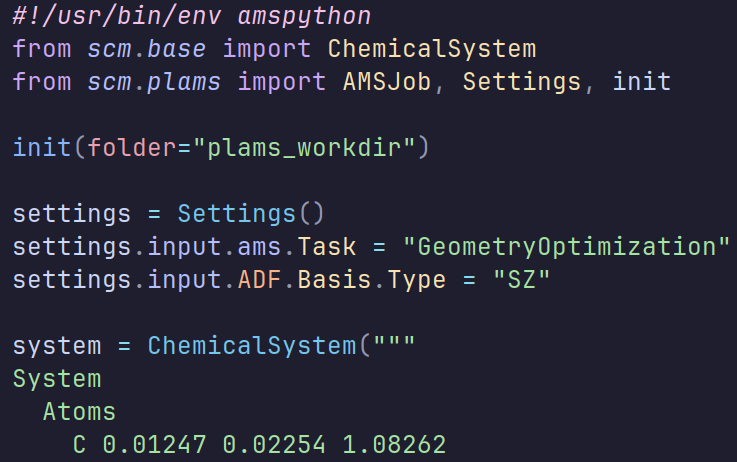
To run a job with Python, we will
create a Python file
jobname.pycontaining the calculation settings and system, andrun it with the
amspythonPython interpreter that is included with AMS.
You can also run jobs with Jupyter notebooks if you prefer.
Important
This tutorial requires that you run commands from the command-line, so make sure to familiarize yourself with the command-line and the AMS input format first.
Set up the job in AMSinput
Let’s convert the Getting started: Geometry optimization of ethanol to a PLAMS Python script. It is easiest to do this from AMSinput:
 in the yellow drop-down if not already active
C 0.01247 0.02254 1.08262
C -0.00894 -0.01624 -0.43421
H -0.49334 0.93505 1.44716
H 1.05522 0.04512 1.44808
H -0.64695 -1.12346 2.54219
H 0.50112 -0.91640 -0.80440
H 0.49999 0.86726 -0.84481
H -1.04310 -0.02739 -0.80544
O -0.66442 -1.15471 1.56909
View the run script in AMSinput
This shows the command and input to AMS that will be executed when the job is run.
Here is an annotated version with the Python equivalents (we will create the Python script in the next step):
Task GeometryOptimization # input_model.Task = "GeometryOptimization"
System # input_model.System = ChemicalSystem(....)
Atoms
C 0.01247 0.02254 1.08262
C -0.00894 -0.01624 -0.43421
H -0.49334 0.93505 1.44716
H 1.05522 0.04512 1.44808
H -0.64695 -1.12346 2.54219
H 0.50112 -0.9164 -0.8044
H 0.49999 0.86726 -0.8448099999999999
H -1.0431 -0.02739 -0.80544
O -0.66442 -1.15471 1.56909
End
BondOrders
1 2 1.0
1 3 1.0
1 4 1.0
1 9 1.0
2 6 1.0
2 7 1.0
2 8 1.0
5 9 1.0
End
End
Engine ADF # adf = ADF()
Basis # adf.Basis
Type SZ # adf.Basis.Type = "SZ"
End
EndEngine
eor
Export a PLAMS Python script from AMSinput
ethanol.pyNow open ethanol.py in a text editor. The full contents can be expanded below,
but we will focus on specific parts of the script.
For simple examples, it is often easy to write the script directly yourself. However, Export PLAMS script becomes especially helpful for more complicated jobs, where the AMS input contains many blocks and subblocks and it is harder to see how to construct the corresponding input model in Python. In that case, exporting from AMSinput gives you a correct working starting point that you can then simplify or modify.
Reveal full contents of ethanol.py
#!/usr/bin/env amspython
""" Run this script with this command: $AMSBIN/amspython scriptname.py """
from scm.base import ChemicalSystem
from scm.inputs import ADF, AMS
from scm.plams import AMSJob, init, log
def main():
job_name = "ethanol"
job = AMSJob(settings=get_input(), name=job_name)
job.settings.runscript.preamble_lines = []
job.settings.runscript.postamble_lines = []
jobs = [job]
init(folder="plams_workdir")
# use_parallel_jobrunner() # Uncomment this line to run each job on 1 core, but run many simultaneously. (Only useful if you run more than 1 job)
for job in jobs:
job.run()
# === Start accessing results here ===
for job in jobs:
log(f"Job {job.name} has finished.")
return jobs
def get_input() -> AMS:
"""Returns the input model for the AMSJob."""
input_model = AMS()
input_model.Task = 'GeometryOptimization'
adf = ADF()
adf.Basis.Type = 'SZ'
input_model.Engine = adf
input_model.System = ChemicalSystem("""
System
Atoms
C 0.01247 0.02254 1.08262
C -0.00894 -0.01624 -0.43421
H -0.49334 0.93505 1.44716
H 1.05522 0.04512000000000001 1.44808
H -0.64695 -1.12346 2.54219
H 0.50112 -0.9164000000000001 -0.8044
H 0.49999 0.86726 -0.84481
H -1.0431 -0.02739 -0.80544
O -0.66442 -1.15471 1.56909
End
BondOrders
1 2 1
1 3 1
1 4 1
1 9 1
2 6 1
2 7 1
2 8 1
5 9 1
End
End
""")
return input_model
def use_parallel_jobrunner(maxjobs=None):
from scm.plams import config, JobRunner
if maxjobs is None:
import multiprocessing
maxjobs = multiprocessing.cpu_count()
log(f"Running up to {maxjobs} jobs in parallel simultaneously")
config.default_jobrunner = JobRunner(parallel=True, maxjobs=maxjobs)
config.job.runscript.nproc = 1
if __name__ == "__main__":
main()
Understand the exported script
If you are not used to Python, it helps to read the script from top to bottom:
import the PLAMS tools we need
define some Python functions
call
main()at the very end
The exported script is written in a fairly general style, so it can also handle more complicated jobs. For a first script, some parts look more advanced than they really are.
Imports
At the top of the script you will see lines like:
from scm.base import ChemicalSystem
from scm.inputs import ADF, AMS
from scm.plams import AMSJob, init, log
These lines make the classes and functions used by the script available:
ChemicalSystemstores the molecular structureAMSandADFare input models: they hold the AMS and engine input optionsAMSJobdefines a calculation to runinit()prepares the PLAMS working directorylog()prints a message in the PLAMS output
Only the engines you actually use are imported, so a script exported for a different engine will
import BAND, DFTB, ForceField, and so on instead of ADF.
The main() function
The central part of the script is:
def main():
job_name = "ethanol"
job = AMSJob(settings=get_input(), name=job_name)
jobs = [job]
init(folder="plams_workdir")
for job in jobs:
job.run()
for job in jobs:
log(f"Job {job.name} has finished.")
return jobs
This is already a complete workflow:
make the input, including the system
create the job
run the job
print a message afterwards
Why is there a main() function at all? Only because it is good practice for Python scripts.
In a short script, you do not strictly need it.
The input part
The exported get_input() function contains:
input_model = AMS()
input_model.Task = "GeometryOptimization"
adf = ADF()
adf.Basis.Type = "SZ"
input_model.Engine = adf
This is the Python version of the AMS input blocks. You can often read it almost literally:
input_model.Task = "GeometryOptimization"corresponds toTask GeometryOptimizationadf.Basis.Type = "SZ"corresponds to the ADF engine block withBasisandType SZ
AMS and ADF are input models: typed Python objects that mirror the AMS input.
You do not need to create the subblocks yourself, they already exist, so input_model.GeometryOptimization.MaxIterations = 100
works straight away. Because the blocks and keys are typed, your editor can autocomplete them and
a typo like input_model.Taks or an invalid value is reported immediately instead of failing
once the job runs.
This is another reason why Export PLAMS script is so useful for advanced jobs. For small examples, writing the input model by hand is often easy. For larger jobs with many engine options, constraints, properties, or multiple systems, the exported script shows exactly how AMSinput translated the GUI setup into Python assignments.
The two lines
job.settings.runscript.preamble_lines = []
job.settings.runscript.postamble_lines = []
are generated by AMSinput for completeness. They hold shell commands to put before and after the AMS call in the job’s run script, which is where AMSinput puts environment variables it exported. For this example they are empty, so you can simply remove them.
The system part
The structure is part of the input model, assigned to its System field:
input_model.System = ChemicalSystem("""
System
Atoms
...
End
End
""")
If a job uses several named systems, as for example a NEB calculation does,
they appear as input_model.Systems["final"] = ChemicalSystem(...) next to the main one.
You can also build the same object separately and assign it afterwards:
system = ChemicalSystem("""
System
Atoms
C  0.01247  0.02254  1.08262
C -0.00894 -0.01624 -0.43421
H -0.49334  0.93505  1.44716
H  1.05522  0.04512  1.44808
H -0.64695 -1.12346  2.54219
H  0.50112 -0.91640 -0.80440
H  0.49999  0.86726 -0.84481
H -1.04310 -0.02739 -0.80544
O -0.66442 -1.15471  1.56909
End
BondOrders
1 2 1.0
1 3 1.0
1 4 1.0
1 9 1.0
2 6 1.0
2 7 1.0
2 8 1.0
5 9 1.0
End
End
""")
That is often the easiest form to read if you already know the AMS System block.
If you prefer, you can also read the structure from an external file instead of putting the coordinates directly in the script. That can make the script shorter when the system is large.
If you want to learn more about what a ChemicalSystem can do, see the ChemicalSystem overview.
If you want to see more examples of how structures and input can be written in Python, have a look at the PythonExamples section.
Functions are optional
The exported script uses a function, get_input().
It is useful, but not required.
For a short script, it is completely reasonable to write everything directly in one place:
#!/usr/bin/env amspython
from scm.base import ChemicalSystem
from scm.inputs import ADF, AMS
from scm.plams import AMSJob, init
init(folder="plams_workdir")
input_model = AMS()
input_model.Task = "GeometryOptimization"

adf = ADF()
adf.Basis.Type = "SZ"

input_model.Engine = adf
input_model.System = ChemicalSystem("""
System
Atoms
C 0.01247 0.02254 1.08262
C -0.00894 -0.01624 -0.43421
H -0.49334 0.93505 1.44716
H 1.05522 0.04512 1.44808
H -0.64695 -1.12346 2.54219
H 0.50112 -0.91640 -0.80440
H 0.49999 0.86726 -0.84481
H -1.04310 -0.02739 -0.80544
O -0.66442 -1.15471 1.56909
End
BondOrders
1 2 1.0
1 3 1.0
1 4 1.0
1 9 1.0
2 6 1.0
2 7 1.0
2 8 1.0
5 9 1.0
End
End
""")
job = AMSJob(settings=input_model, name="ethanol")
job.run()
This version does exactly the same calculation, but with less Python syntax around it.
simplified_ethanol.pySo when should you use functions?
If the script is short, skipping functions is fine.
If the script starts to grow, functions help split it into logical pieces.
If you want to reuse the same setup many times, functions become very convenient.
In other words: functions are a tool for readability and reuse, not a requirement of PLAMS.
The final two lines
At the bottom of the exported script you will see:
if __name__ == "__main__":
    main()
For now, you can read this simply as: “when this file is run as a script, execute main()”.
This is standard Python style for executable scripts.
Running the script
$AMSBIN/amspython ethanol.py # or simplified_ethanol.py
PLAMS will create a working directory called plams_workdir unless you choose another name in init(...).
Inside it, you will find a subdirectory for the job, containing the input, output, and result files.
You can open those files in the GUI or text editors.
Running multiple systems
One advantage of writing jobs in Python is that it becomes very easy to repeat the same calculation for several molecules.
For example, you can create a list of systems from SMILES strings:
from scm.base import ChemicalSystem

systems = [
    ChemicalSystem.from_smiles("O"),
    ChemicalSystem.from_smiles("CO"),
    ChemicalSystem.from_smiles("CCO"),
]
Then run the same input for all of them:
from scm.inputs import ADF, AMS
from scm.plams import AMSJob, init

init(folder="plams_workdir")

input_model = AMS()
input_model.Task = "SinglePoint"

adf = ADF()
adf.Basis.Type = "SZ"
input_model.Engine = adf

jobs = []
for i, system in enumerate(systems, start=1):
    job = AMSJob(settings=input_model, molecule=system, name=f"molecule_{i}")
    job.run()
    jobs.append(job)
Here the structure is passed as molecule instead of being set on the input model, so the same
input can be reused for every system.
After the jobs have finished, you can extract the energy in hartree:
for job in jobs:
    energy = job.results.get_energy()
    print(job.name, energy)
Here is the full script:
Reveal full multiple-molecule script
#!/usr/bin/env amspython
from scm.base import ChemicalSystem
from scm.inputs import ADF, AMS
from scm.plams import AMSJob, init

init(folder="plams_workdir")

systems = [
    ChemicalSystem.from_smiles("O"),
    ChemicalSystem.from_smiles("CO"),
    ChemicalSystem.from_smiles("CCO"),
]

input_model = AMS()
input_model.Task = "SinglePoint"

adf = ADF()
adf.Basis.Type = "SZ"
input_model.Engine = adf

jobs = []
for i, system in enumerate(systems, start=1):
    job = AMSJob(settings=input_model, molecule=system, name=f"molecule_{i}")
    job.run()
    jobs.append(job)

for job in jobs:
    energy = job.results.get_energy()
    print(job.name, energy)
This kind of loop is one of the main reasons to use Python: once you can run one job, running many similar jobs is only a small extra step.
What to remember
For a first PLAMS script, the most important ideas are:
input models such as
AMSandADFare the Python version of the AMS input blocksChemicalSystemstores the structureAMSJobcombines input and structure into a calculationhelper functions are optional and mainly help keep larger scripts organized
Once you are comfortable with the short version above, you can gradually add more Python features when they become useful.
Next steps
To learn more about working with structures, see the ChemicalSystem overview.
For many more ideas and ready-to-run examples, see Python Examples.