Reactions Discovery
Starting with AMS2024, the Amsterdam Modeling Suite contains a Reactions Discovery workflow for finding possible (side) reactions from a set of reactant molecules.
In this tutorial, you will predict some possible reactions for MEA (monoethanolamine) in CO₂ and H₂O, using a ReaxFF force field.
Set up and run Reactions Discovery
 →
→ 

 next to the Task, or switch to the Model → Reactions Discovery panel.
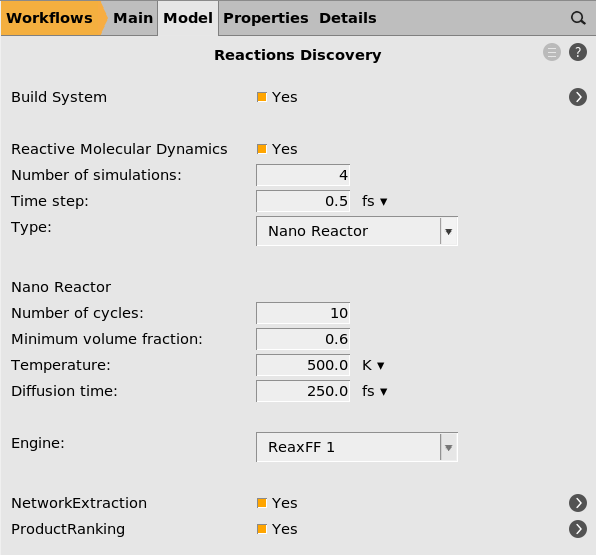
The main Reactions Discovery input panel contains the most important input settings.
For the NanoReactor, the most important number to modify is the Minimum volume fraction, which controls how strong the reactor is. For details, see the Reactions Discovery documentation.
In this tutorial, we will leave all settings at the default values, but it’s a good idea to experiment with different numbers.
next to Build System. This brings you to the RD System panel.200 (default)0.9 g/cm³. next to Molecule
O (this is water)1.0 next to MoleculeNCCO (this is MEA)2.0 next to MoleculeO=C=O (this is CO₂)3.0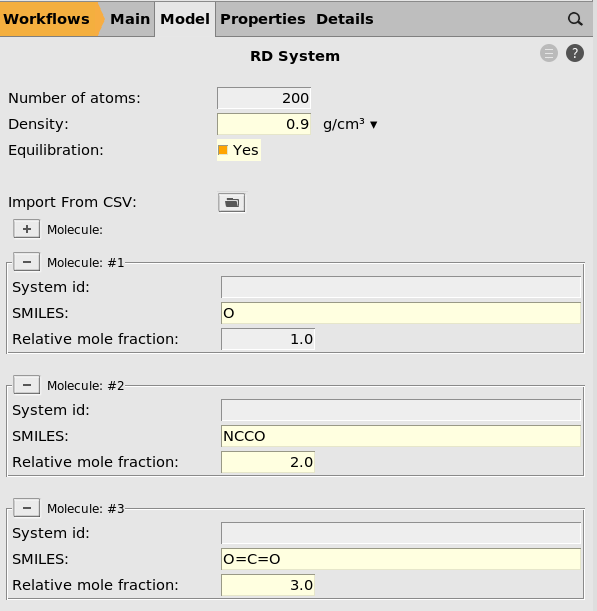
When the job runs, this will build the initial system with approximately 200 atoms at a density of 0.9 g/cm³ with the specified relative mole fractions. Feel free to change the number of atoms or density to see how it affects the resulting simulation.
Here you can see that the Engine is set to ReaxFF 1. In this tutorial, we will use ReaxFF, but you can also change it to a different engine. Keep in mind that the simulations can be quite computationally expensive, so it’s best to use a fast compute engine.
Then save and run the job:
The calculation will take a few minutes to finish.
View the Reactions Discovery Results
Wait until the calculation has finished.
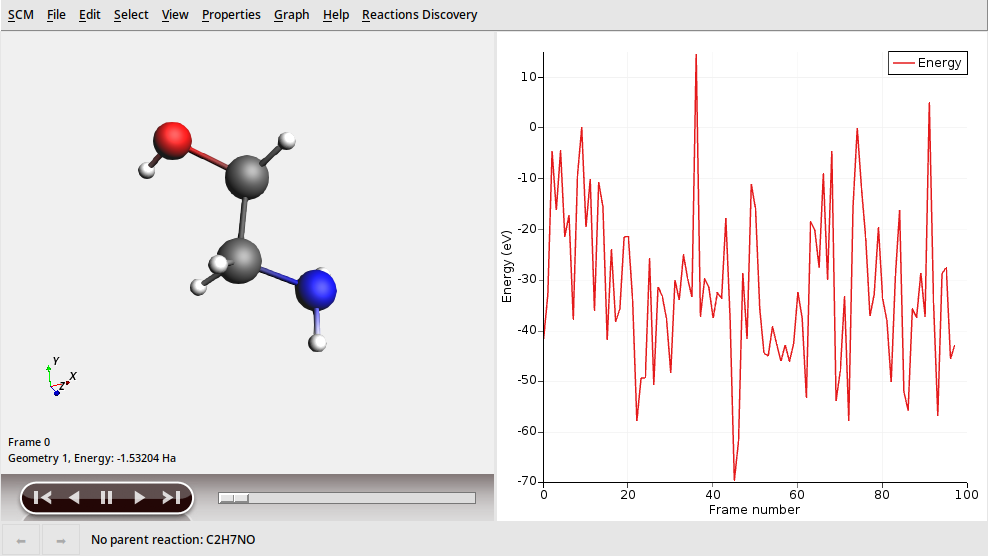
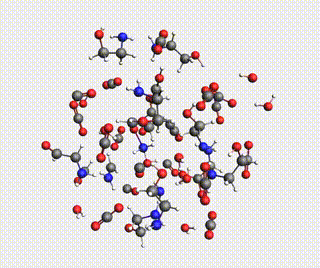
This shows all molecules that were generated, which can be quite many.
Let’s filter on only the stable products:
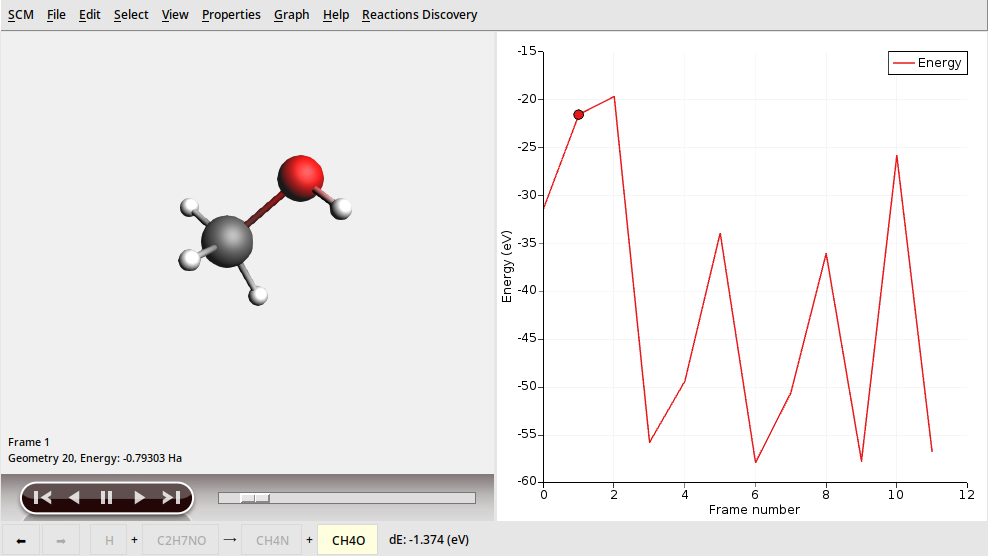
This shows the list of products in order of formation likelihood.
Note
Your results may be different from those shown here, as the reactions discovery relies on molecular dynamics simulations.
View the individual MD simulations
It is always helpful to inspect the individual MD simulations to see if the reactor is too aggressive or not aggressive enough.
mdsim_0, mdsim_1, etc. directories inside the jobname.results directory, and select the ams.rkf file to open.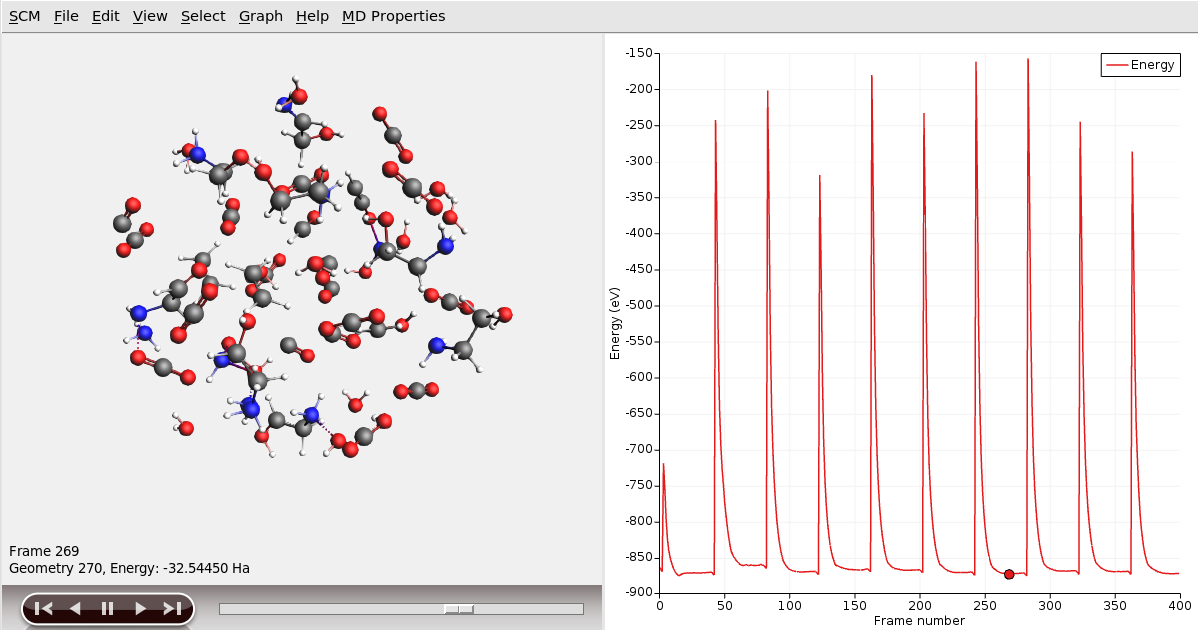
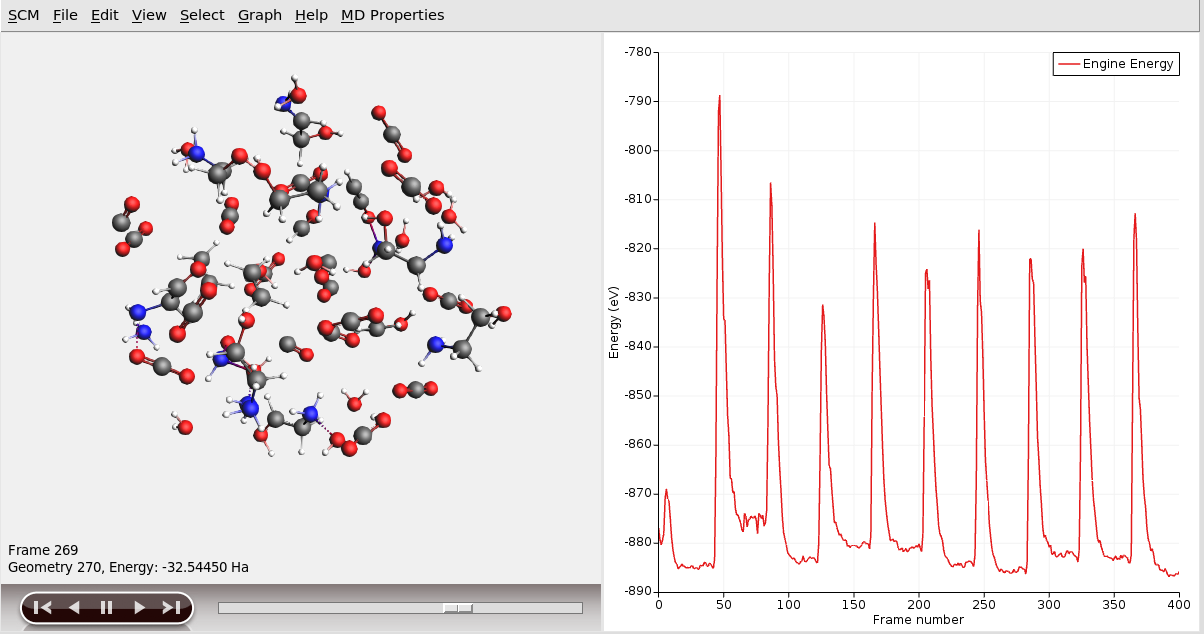
Tip
The displayed energy is the total energy including the kinetic and restraint energies. Use Graph → Engine Energy to view the ReaxFF-calculated potential energy without restraints.
See the Reactions Discovery Frequently Asked Questions for tips on how to tune the parameters of the simulation