Water on an aluminum surface
This tutorial will help you to:
- create an aluminum slab
- add a solvent (water)
- run the simulation and see what happens
Step 1: Start ReaxFFinput
- Start ADFjobsUse the SCM → New input menu commandSwitch to ReaxFF mode (panel bar ADF → ReaxFF)
Step 2: Creating the surface
Bulk aluminum has an fcc crystal structure, with a lattice constant of about 4.0 Angstrom.
To create the surface, we first build bulk aluminum:
- Edit → Crystal → Cubic → fccIn the dialog that appears:Select the preset AlClick the OK buttonView → Periodic → Repeat Unit Cells
In your molecule editor screen you should see a picture of the bulk aluminum structure. The unit cell contains one atom. As ReaxFF input by default does not show repeated cells, it had to be turned on explicitly. Otherwise you see only the single atom in the unit cell.
Now create the surface:
- Edit → Crystal → Generate Slab...In the Dialog window:Check the Cartesian check boxSet the number of layers to
3Click OKView → Periodic → Repeat Unit Cells

You will see three atoms as it is a three-layer slab.
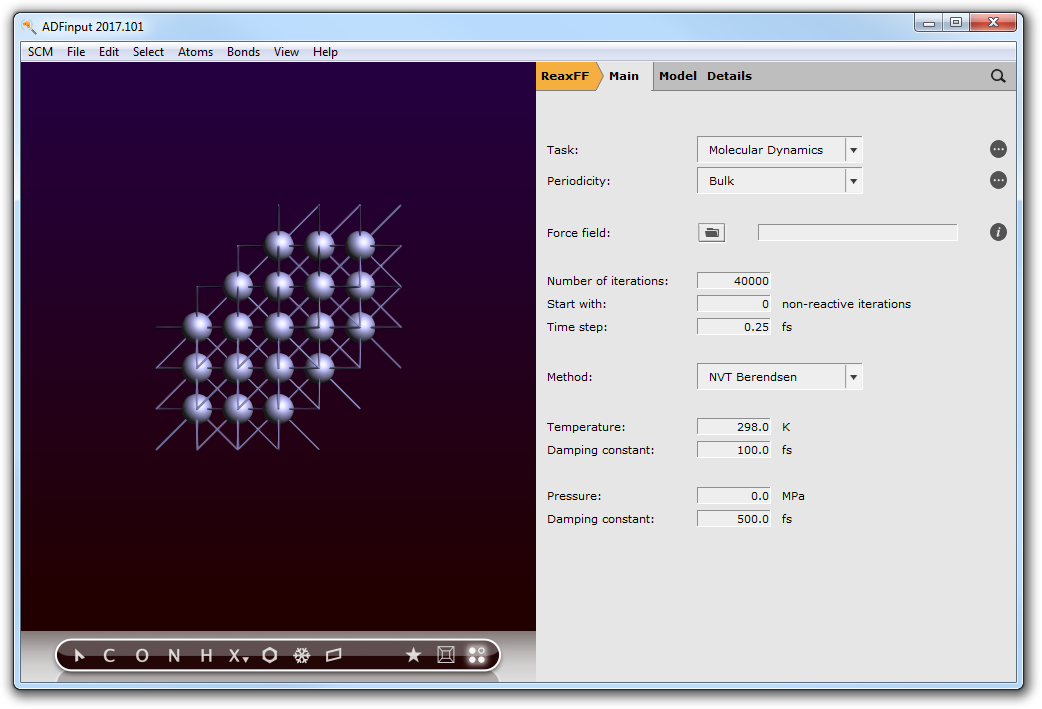
In this case we do not want just one unit cell, but a much bigger piece of the slab:
- Turn off periodic view:View → Periodic → Repeat Unit CellsEdit → Crystal → Generate Super Cell...Put
10,10,1on the diagonalClick OKRotate get a better view
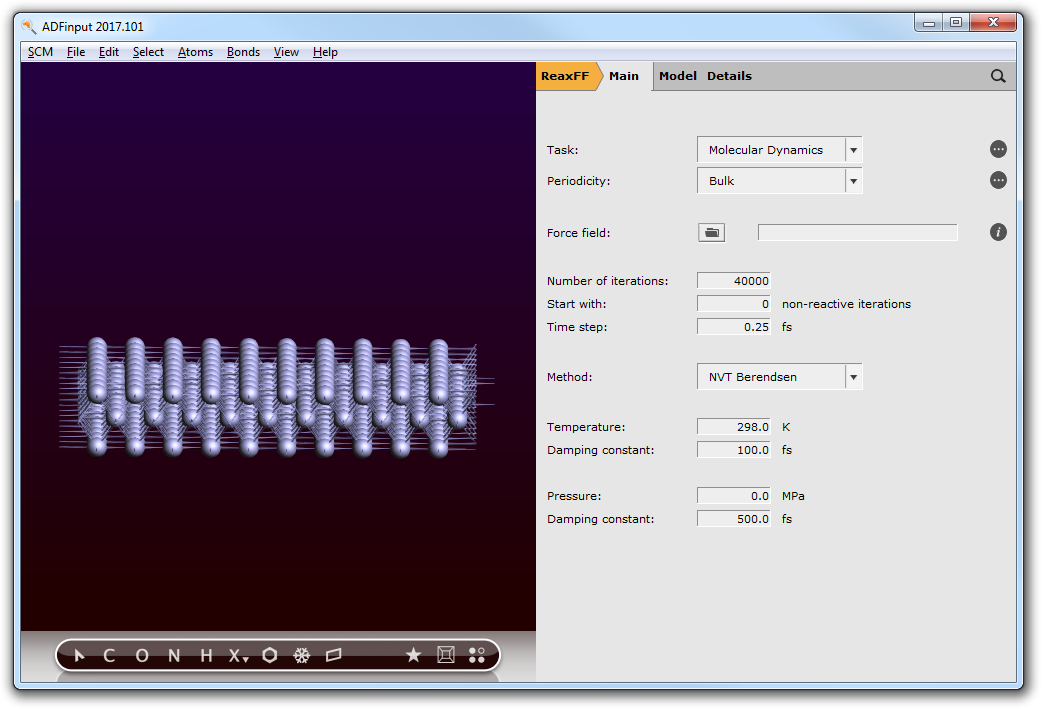
Now we have a real slab of aluminum, three layers thick. Note that the Generate Super Cell command adjusted the lattice vectors to match the new unit cell.
Step 3: Add solvent
The next step is to add water to the system, and make sure that the slab is in the center of the simulation box:
- Edit → Builder
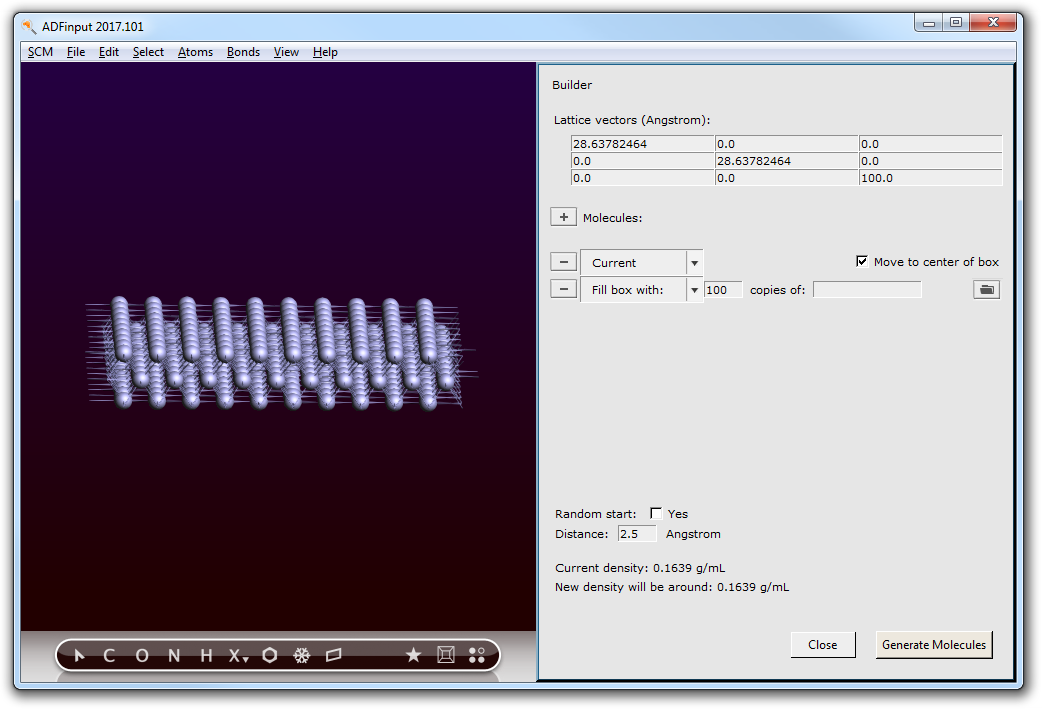
- Change the third dimension of the lattice vectors to
100.0Check the Move to center of box box on the line for the Current moleculeTypewain the line with ‘Fill box with’Select Water (ADF) from the search resultsSpecify2500copiesSpecify a distance of1.0Angstrom (this is the minimum distance between the molecules)Click the Generate Molecules button on the bottomMake sure the origin is in the center of the box: Edit → Set OriginUse the View → Periodic → Show Unit Cell command to visualize the boxRotate to your favorite view

Step 4: Set up the simulation, including a temperature regime
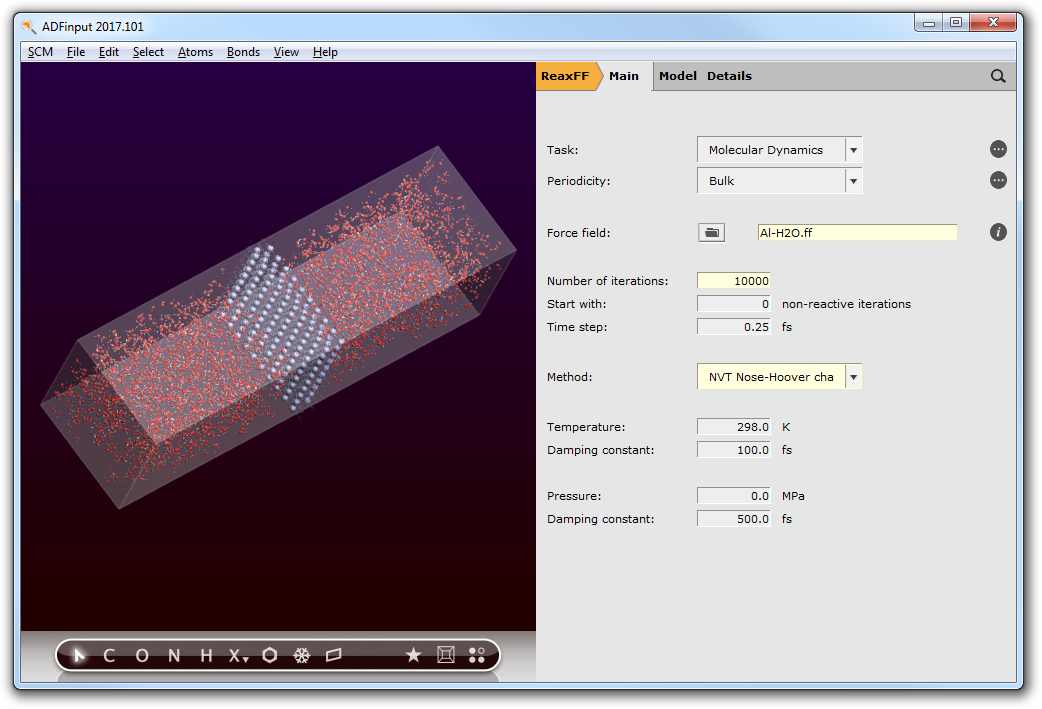
Now we will set up the MD-simulation. We will use the Al-water force field and a Nose-Hoover thermostat with a default damping constant of 100 fs:
- Close the Builder by clicking the Close button on the bottomClick on the folder icon and select the Al-H2O force fieldSpecify
10000iterationsFrom the Method menu, select NVT Nose-Hoover chains
In the simulation we would like something to happen. So we will use a high temperature for water, but try to keep the aluminum cool. Also, we will start with a low temperature MD to relax the initial set-up. This can all be accomplished using a temperature regime, specifying different temperatures for different regions.
For this we first need to define two new regions: one for the aluminum slab, and one for the water. Regions in ReaxFFinput are the same as in the ADF-GUI: they are defined as a collection of atoms. Via the Regions panel you can define the regions:
- panel bar Model → RegionsClick once on the select button (the V like button) in the Auto-Generated region
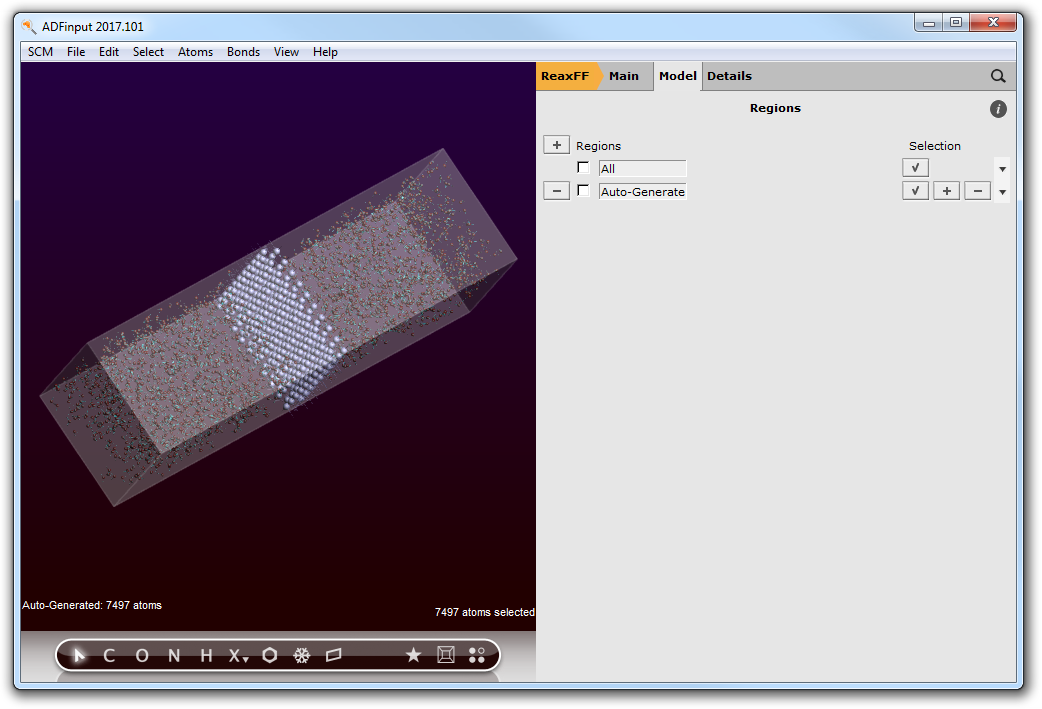
By pressing the select button you have selected all atoms in the ‘Auto-Generated’ region. This region will always contain the atoms that are added by the Builder. Thus, as you can see, all water molecules are selected.
We are going to set up a region for the water molecules, and a region for the aluminum surface:
- With the water molecules still selected, press the + button in front of the Regions labelClick and select the text
Region_2and change it intoWater
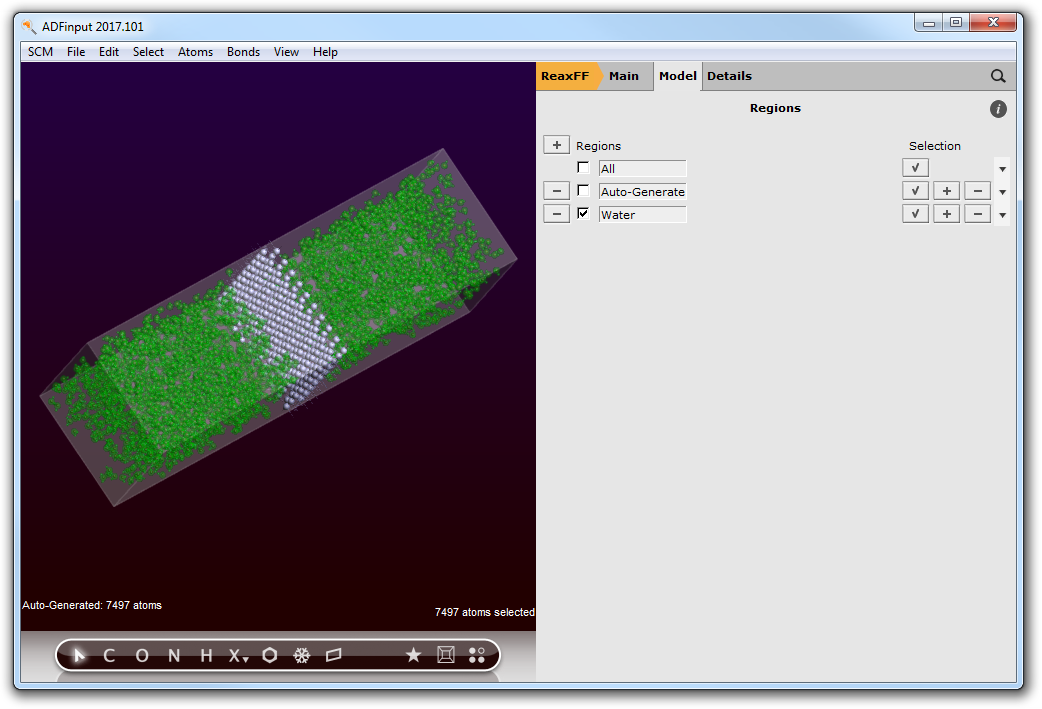
Now we have a region defined that contains all water molecules. Note that the selected atoms (in this case all water molecules) were automatically added to the new region. The + and - buttons add or remove the selected atoms to a region.
- Click in the drawing area so it has focus (otherwise the next will select the region name)Select → Select AllPress the + button in front of the Regions label again to add a new region (containing everything as everything was selected)Change the name
Region_3toAlClick the select button in the Water region to select all water moleculesClick the - button in the Al region to remove the water from the Al regionClick in empty space to clear the selection
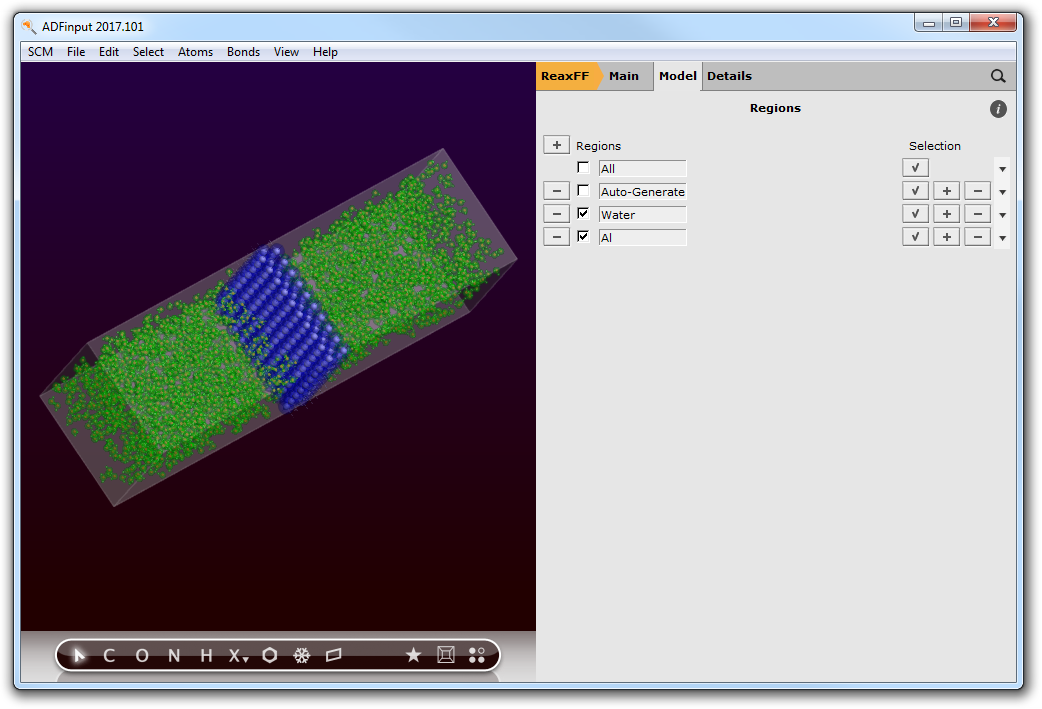
The different regions are shown with colors. This does make the display a lot slower. You can turn off (or on) this display with the check box in front of the Region names, and you can set visualization style per region:
- Uncheck the check box at the left of the Water region linePress the triangle on the right side of the Al region line, and choose for the Balls And Sticks visualization option

Now we have defined the regions that we need, now set up the temperature regime:
- Panel bar Model → Temperature RegimePress the + button in front of the Regime label twice to add two temperature steps

At iteration 0, we start with an MD simulation at T=0 K:
- change the first
298.0to0.0(note this applies to region All which is everything)
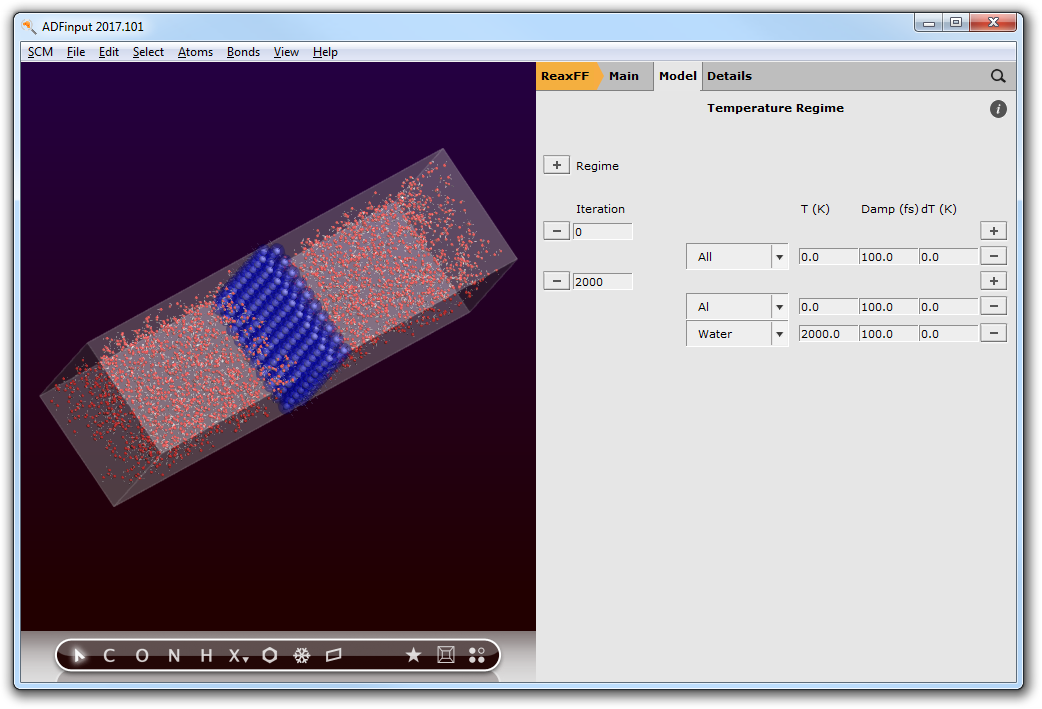
At iteration 2000, we set the water temperature to 2000 K, while keeping the aluminum temperature at 0 K:
- Change the number of iterations from
10000to2000Press the + button on the right side of the line starting with 2000Change the first All on the 2000 step to Al, and change its temperature to0.0KChange the second All on the 2000 step to Water, and change its temperature to2000.0K
Your temperature regime setup should look like this:
Step 5: Run the simulation
Now we can run our set up:
- File → RunWhen asked to save, specify
Al-wateras filenameA warning will be shown regarding a force field problem. Click Ok in the dialog then Yes to save the run script.Let it run for some time (until iteration 500 or so)SCM → MovieView → Molecule → Balls And SticksRotate and zoom to get a good view of the surface
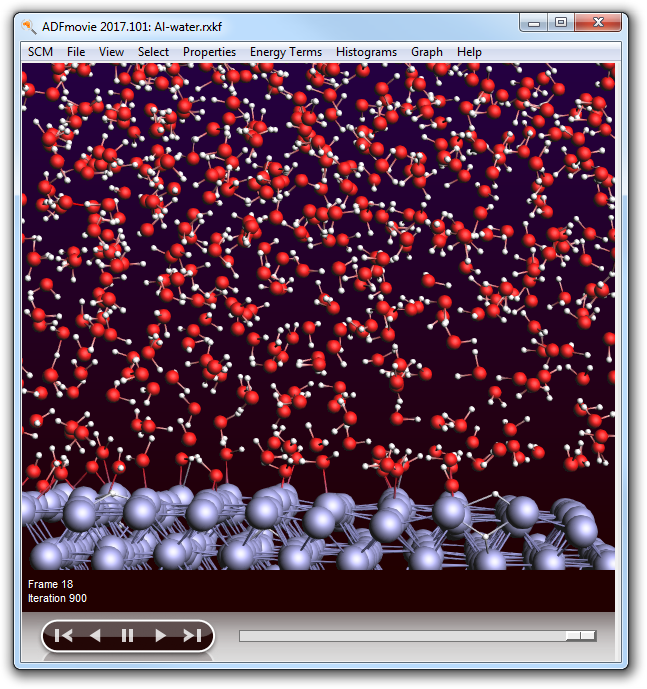
If you look around, you will most likely see many water molecules attaching to the aluminum surface. After some time, you might also see hydrogen atoms distracted from the water molecules, which are now moving around the surface on their own.
You might leave the simulation running to see what will happen. It will take a lot of time though.
If you do not want to wait for the simulation to finish, kill the job:
- Bring the ADFjobs window to the frontMake sure your Al-water job is selected (click once on it if not)Kill it Job → KillClose all GUI modules: SCM → Quit All