Generating a batch of jobs and collecting results: Basis Set Effects for NH3 Geometry
This tutorial will help you to:
- pre-optimize structures using different methods, including MOPAC
- starting from an existing .adf file, create a batch of similar jobs using the Prepare tool in ADFjobs
- interactively submit a set of jobs using ADFjobs
- using the Report tool in ADFjobs, analyze results of multiple calculations at once
Step 1: Create and pre-optimize your molecule
- Start ADFinputCreate an N atomPress Esc, and click in empty space sRotate a little, as we want an extra H out of plane.Press Esc, and click in empty space so that nothing is selected.Add 2 more hydrogen atoms this way.
You should see one nitrogen and three hydrogen atoms in the drawing area now. We intentionally did not add bonds between the N and H atoms!
First we will try to optimize this structure using the default pre-optimizer (UFF):
- Click ‘Pre-optimize’ cog wheel button
Using the default pre-optimization algorithm will lead to a structure with way to big N-H distances:

Next we will try to optimize using Mopac.
- Undo the previous optimization: Edit → UndoRight-click on the cog-wheel, select Mopac to pre-optimize
The message ‘MOPAC ready’ will be displayed in the ADFinput window:

Mopac will produce a good-looking pyramidal ammonia molecule, with the N-H bond length of about 1.0 Angstrom.
Additionally, it will create proper N-H covalent bonding! These bonds are based on the bond-orders as calculated by Mopac.
Step 2: Set up a single ADF calculation
Now with our pre-optimized NH3 molecule, we will set up a series of calculation: the optimization of NH3 with ADF, using different basis sets. The first step is to set up a simple geometry optimization:
- Select the ‘Main’ panelSelect the Geometry Optimization taskSave as NH3
We have used all defaults for basis set and so on.
Step 3: Set up a batch of ADF jobs
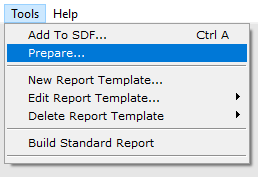
Next we will set up a series of calculations, using the Prepare tool.
- Select the ADFjobs windowIn ADFjobs window, locate the ‘NH3’ job saved earlierClick onto ‘NH3’ line to select itUse the Tools → Prepare... command
The Prepare dialog window will pop up.
Because we have selected the NH3 job earlier, NH3.adf filename (including the path) will show up in the ‘Run’ field (otherwise, we can select NH3 using ‘+’ button of the ‘Run’ field). This means we are going to create jobs that are identical to the NH3 job, but with some details changed (this will next be specified in the Prepare dialog).
- Go to the ‘Use these input options’ and click ‘+’Choose ‘Basis Set and Frozen Core’ → ‘SZ’ → ‘Large’In the similar manner, add basis sets ‘DZ’, ‘DZP’, ‘TZP’ (optionally ‘TZ2P’ and ‘QZ4P’)Use core ‘Large’ for all the basis sets

The basis set options selected will show up in the ‘Use these input options’ field. Note that by default the jobs will be created in the ‘autojobs’ directory, as specified in the ‘Produce jobs’ section.
- Now click ‘OK’ in the Prepare window
The Prepare dialog will close and ADFjobs will open the ‘autojobs’ directory. Using NH3.adf, the Prepare tool created a set of jobs inside ‘autojobs’ named as ‘NH3.SZ.Large.adf’, ‘NH3.DZ.Large.adf’ etc. The files naming intuitively follows the basis set options which has been used, and the rest of the options of the newly created files are exactly the same as in NH3.adf. The original NH3.adf file has not been altered.

Step 4: Run your set of ADF jobs
Now we are going to run the batch of ADF jobs which has been automatically prepared in the previous Step 3 of the tutorial Using ADFjobs, one can either run this set of jobs one by one, or all at once.
- Click on the first jobShift-Click on the last jobRun the jobs Job → Run
This will run the jobs in the default queue. Normally this is the Sequential queue, and the jobs will actually run one after another.
The jobs will start running and their progress can be tracked in ADFjobs. Each ammonia optimization job should not take more than a few minutes.
Step 5: Analyze results of several calculations at once
When all the ammonia optimization jobs are finished, we can compare the results. The main conclusion that you will (should) reach is that DZ (double zeta) basis set optimization, job name ‘NH3.DZ.Large’, leads to the incorrect planar ammonia molecule. As covered in the preceding tutorials, you can optionally use several GUI modules to observe that:
- ADFmovie, which will show the geometry optimization
- ADFinput, which will open the (last) converged geometry
- ADFview, which will open the converged geometry and also would display various density maps in 3D
For example, let us use ADFview to demonstrate the results:
- Clear the selection in ADFjobs (press Esc)Select job NH3.DZ.Large in the ADFjobs window (should then be highlighted)Select SCM → ViewSelect Fields → Grid → FineSelect Properties → HOMOIn the isosurface contour value field which appeared at the bottom,change the default ‘0.03’ to ‘0.3’Type ‘ctrl/cmd-minus’ several times, until the central N atom balldoes not overlap strongly with the HOMO orbital.Repeat for this for the DZP calculation
What you will observe is that HOMO of ammonia does not have the anticipated sp3 hybridization, when DZ basis set is used. In the following picture you can see both the DZ and DZP results:

To visualize results from several jobs automatically, you can use the Report tool within ADFjobs:
- Go to the ADFjobs windowSelect Tools → New Report Template...

This will open up Report dialog.
In the ‘Report’ field, you can choose the name for your report file and its format (‘HTML’ or ‘Tab separated plain text’). The other fields (‘General’, ‘Images’, ‘Results’) contain various relevant options you can choose for preparing your report.
- In the ‘Report’/’Template name’ field, type ‘MyReport’In the ‘Results’ section check ‘Dipole Moment’ and ‘Dipole Vector’In the ‘Extra ADFreport command line options’ field: enter ‘angle#labels#2#1#3’

The extra command line options used instruct ADFreport to report the angle between atoms 2, 1 and 3, and include the atom labels for this angle on output. In a similar way more angles could be requested, or distances, or many other properties. For a description of all options please check the adfreport documentation.
- Click ‘OK’
The Report dialog will close, saving our template named ‘MyReport’. Now we will generate actual report following the saved template:
- In ADFjobs window, select all the finished jobs from the NH3 setSelect Tools → Build MyReport Report

‘Save As’ dialog window will pop up, showing the ‘report.html’ default filename.
- Choose your filename and location, then click ‘Save’
Now ADF will work through all your selected jobs and prepare the report. Finally the browser will start showing your report file (by default, named ‘report.html’):

The Report tool created a table-like report of the results.
We can clearly see that only for DZ basis optimization our NH3 molecule is planar (check the last row of the report table). The dipole data are also shown in the report. Obviously the dipole moment is zero only for the planar NH3 structure.
Congratulations, we are done with the ammonia optimization tutorial!
- If you want to exit all the GUI modules at once: select SCM → Quit All